

Make your own recycled paper!
- Ecofriendly YYC

- Sep 17, 2018
- 3 min read
Updated: Feb 28, 2021
Do you have stacks of old notes you don’t know what to do with? Instead of throwing them into the recycling bin, you can upcycle them into new paper!
All you need is:

Bin (anything above 20L)
Blender
Rags or towels for drying
Two identical size wooden picture frames
Plastic sheets (we used ziploc bags)
Used paper
Window screen
Heavy blocks/ textbooks
*You don’t need to purchase new supplies, you can stop by at your local thrift store to further reduce your environmental impact.*
Note: For this DIY we purchased the blender, bin and picture frames at value village. Everything else was found at home
Step 1: Make the frame
Picture frames often come with a glass covering and metal brackets; you’ll need to dismantle these parts until you are left with the wooden frame itself.
Cut out a square piece of the window screen slightly larger than the picture frame and use a staple gun to attach the window screen tightly to the sides of one of the frames so that the window screen is taut against the frame!
Note: If the staples don’t go all the way in, you can simply use a hammer to hammer it down!


Step 2 : Make the pulp
Got a zero on an assignment? Take out your frustration and rip it up into small pieces! Rip out as many tests, assignments, notes, and failed labs as you can until you fill ¾ of your blender! Fill up the blender with water until all of the paper is submerged and blend it up until you get a thick pulp.


Step 3: Dilute the Pulp
Fill up the 20 L bin with water about halfway, pour in your blended frustrations and mix it up! Note: If you are feeling a bit more creative, you can add some character to the pulp soup by adding confetti, flower petals, wildflower seeds or even glitter. You can also experiment and up-cycle old coffee grounds by adding them into your pulp soup for coffee scented paper to wake you up in the morning!


Step 4: Prepare your drying station
Lay out your rags or towels for drying, plastic sheets, and your heavy blocks or your overpriced textbooks that you’ve never used and couldn’t sell. Note: Using plastic sheets are optional! If you want to achieve one smooth side of your paper, we advise you to do so! We’ll be using this drying station during step 6!


Step 5 : Prepare to submerge
Take both of your wooden frames, place them together with the frame you made in step 1 below the wooden frame without the screen and submerge these frames in the pulp soup you prepared in step 3. Slowly lift the frame up letting the excess water drain off and you’ll be left with an even layer of wet pulp on top of the screen. Food for thought: the empty frame is used as a mold for the shape of your paper! You can be creative! :)


Step 6 : Dry your paper
Place a second window screen on top of your gathered paper pulp to flatten it out. Place your rag or towel over the window screen and use the sheer power of your bone strength to press down on the screen to get rid of excess water. Once your paper is mostly dry, carefully peel the paper off the screen and place it on top of either a rag or a plastic sheet to obtain a smooth surface.


Step 7: Be patient and let it dry
Lay another towel on top of your paper and use a block or your heavy textbook to keep it flat and prevent wrinkling!
Now wait for a couple of days for your paper to dry!
Note: If your paper comes out wrinkly, you can iron it to flatten it out!
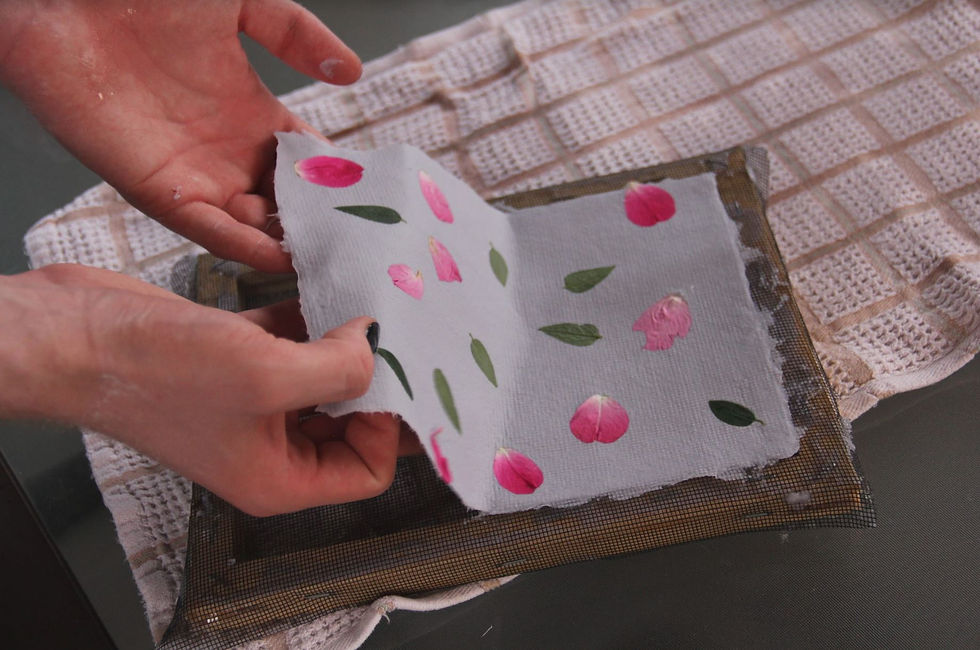
If you’ve decided to be creative and added some flower petals, you can paint over a layer of mod podge to prevent them from falling off!
Once your paper is nice and dry, you can be creative and make photo albums, small booklets and planners, homemade cards, and you can also use your recycled paper for scrap-booking as well! You can be as creative as you’d like!
Have fun!


Comments